Cricut Infusible Ink Coasters with 2 Colors
Learn how to make infusible ink coasters with two colors. I made this cute mushroom coaster for fall, but it’s cute year-round!
If you’re new to Cricut, be sure to check out these Cricut tutorials for beginners.

This post contains affiliate links. By purchasing an item through an affiliate link, I earn a small commission at no extra cost to you. As an Amazon Associate I earn from qualifying purchases.
I don’t know why, but I love mushrooms for fall. Give me a mushroom over a pumpkin any day! They are just so cute.
I’m also obsessed with coasters and again, I don’t know why. They’re an easy craft and they can be made a million different ways.
Tips for Making Your Own Coaster Design
If you make your own coaster designs, you can make them go to the edge or leave a border around the outside.
In this design, I used a lot of negative space (because there is no tan infusible ink for the stem), so I made my design go to the edge.
The tiles are 3.75″ square, so make your design 3.85″ square to cover the entire area. The file below has been updated to the larger size, but I accidentally made mine a little too small.
The corners are rounded on the coasters, but you can still cut squares. It works perfectly.
If you use text, be sure to mirror the design. Some designs may also need to be mirrored. My mushroom design can be used either way.

Tips for Using 2 Colors of Infusible Ink
It’s pretty easy to use 2 colors of infusible ink, but you need to plan for it.
Infusible Ink is transparent, so keep that in mind. If it gets layered, the colors will change.
If you make your own design, you will need to cut the shapes apart. I design everything in Adobe Illustrator, but it works the same in Cricut Design Space.

Select both designs and select slice to remove the front shape from the coaster background. Delete any unwanted pieces.

If desired, select the front shape and make it smaller to create a white line around the edges.

More complicated designs should be duplicated a few times so that you can replace any elements that get deleted when slicing the design.
How to Make Cricut Infusible Ink with 2 Colors
Supplies Needed:
- Cricut coaster blanks (or other blanks*)
- Infusible Ink sheets (I used Cherry Red and Bright Teal)
- Cricut (I use my Cricut Maker 3)
- EasyPress
- EasyPress mat
- Transfer tape
- Mushroom SVG (the download link is at the bottom of this post)
*I used Cricut coasters, but you can use any sublimation ink coasters. These are much cheaper and you can get a lot of them.
- Upload the design into Cricut Design Space as usual.
- Duplicate the design as needed to make more coasters.
- Click “Make it.”
- If you make your own design and it has text, be sure to click mirror the design.
- Select infusible ink in the material list.
- Cut the infusible ink sheet about an inch longer than you need.
- Apply the infusible ink sheet with the color side up onto the standard mat.

- Cut as usual, changing out the color when indicated.
Weeding Infusible Ink and Applying it to Coasters
- Remove the infusible ink sheets from the mat. Peel the sheet away from the mat to prevent it from curling.

- For this design, I removed the entire mushroom shape (including the liner sheet) from the center of the teal background. Weed with your fingers if possible to avoid damaging the infusible ink sheet or liner.

- My Cricut cut it most of the way through, but it was still easy to remove the liner by lightly bending it back and forth.
- I removed the dots for the red mushroom cap, leaving the lining intact.

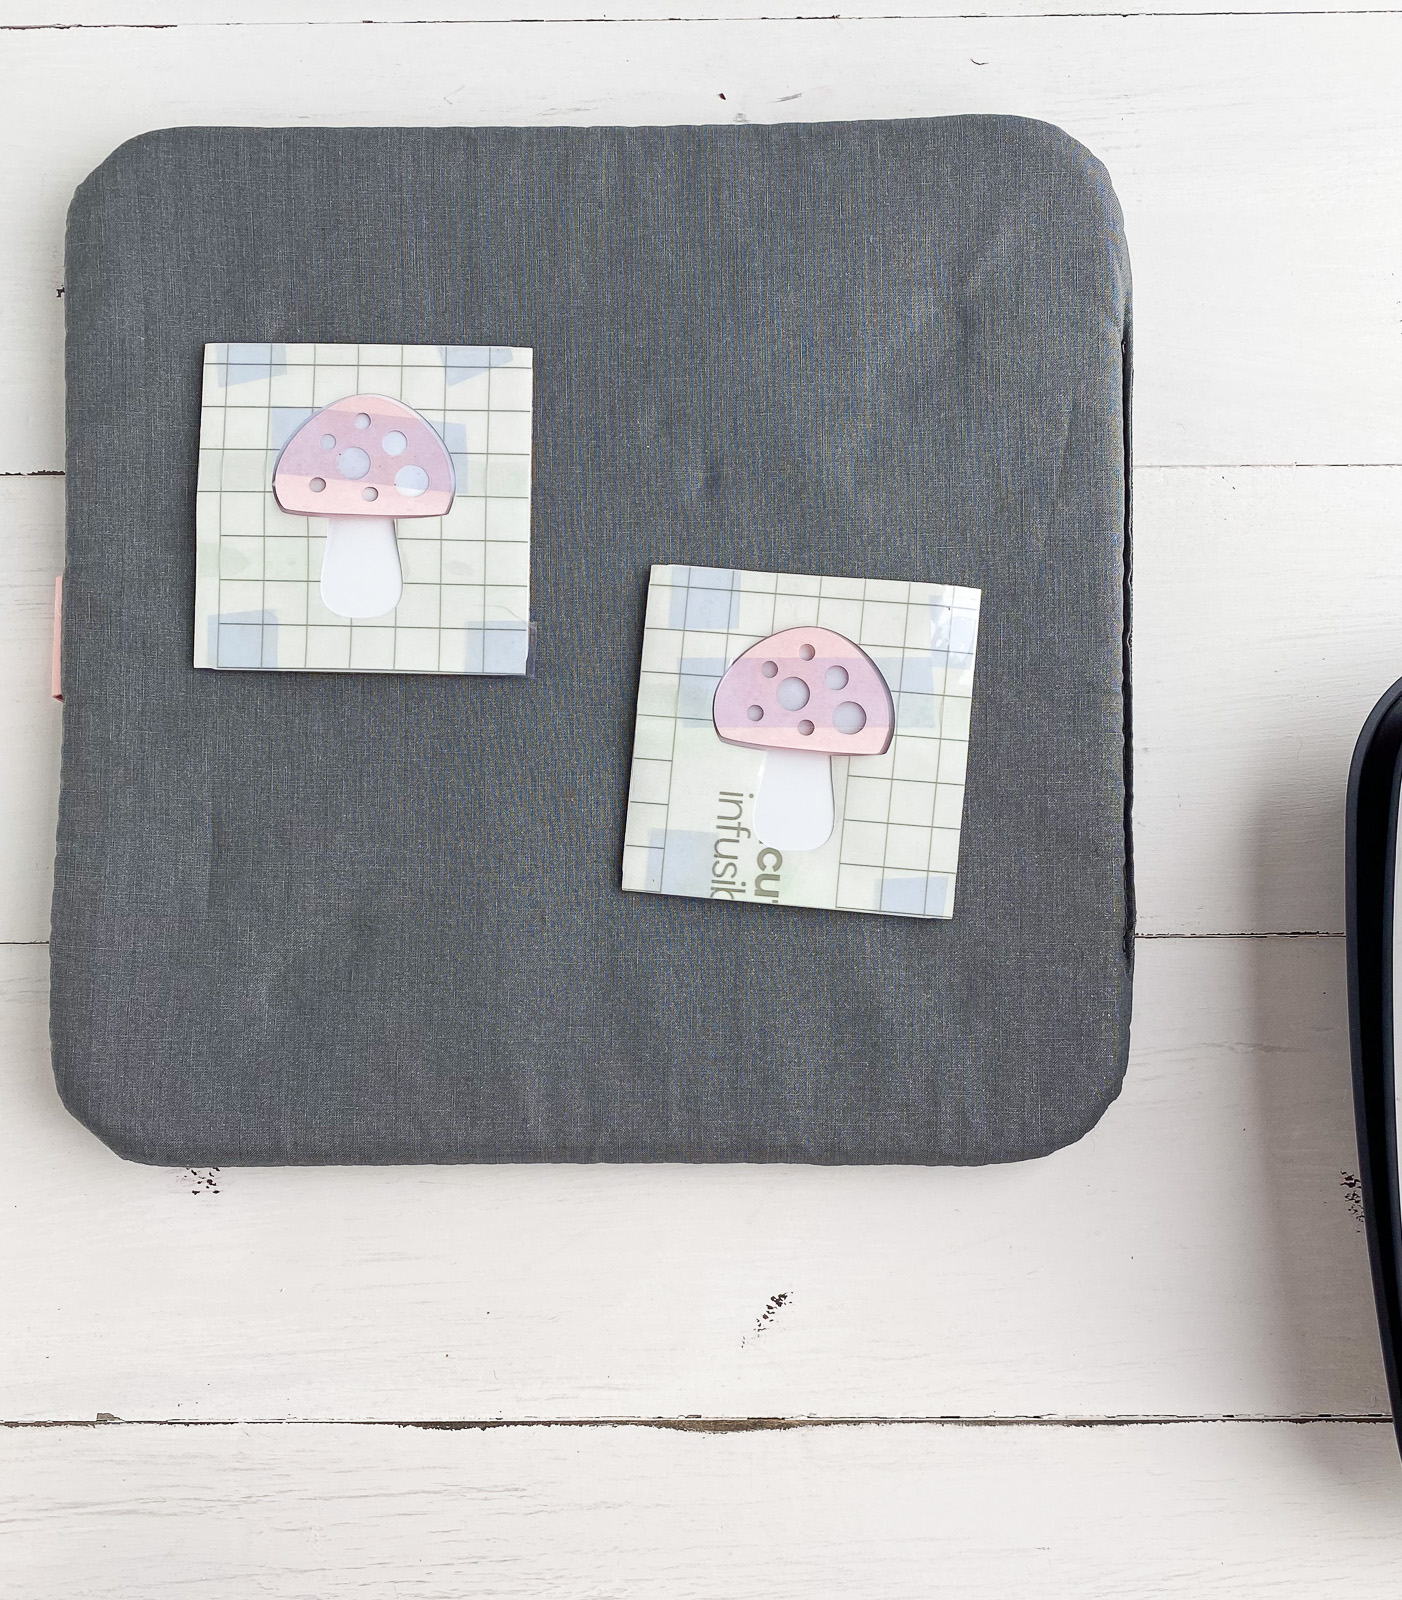
- Place the infusible ink color side down onto the coaster. I placed the teal part first and used transfer tape to keep it in place.
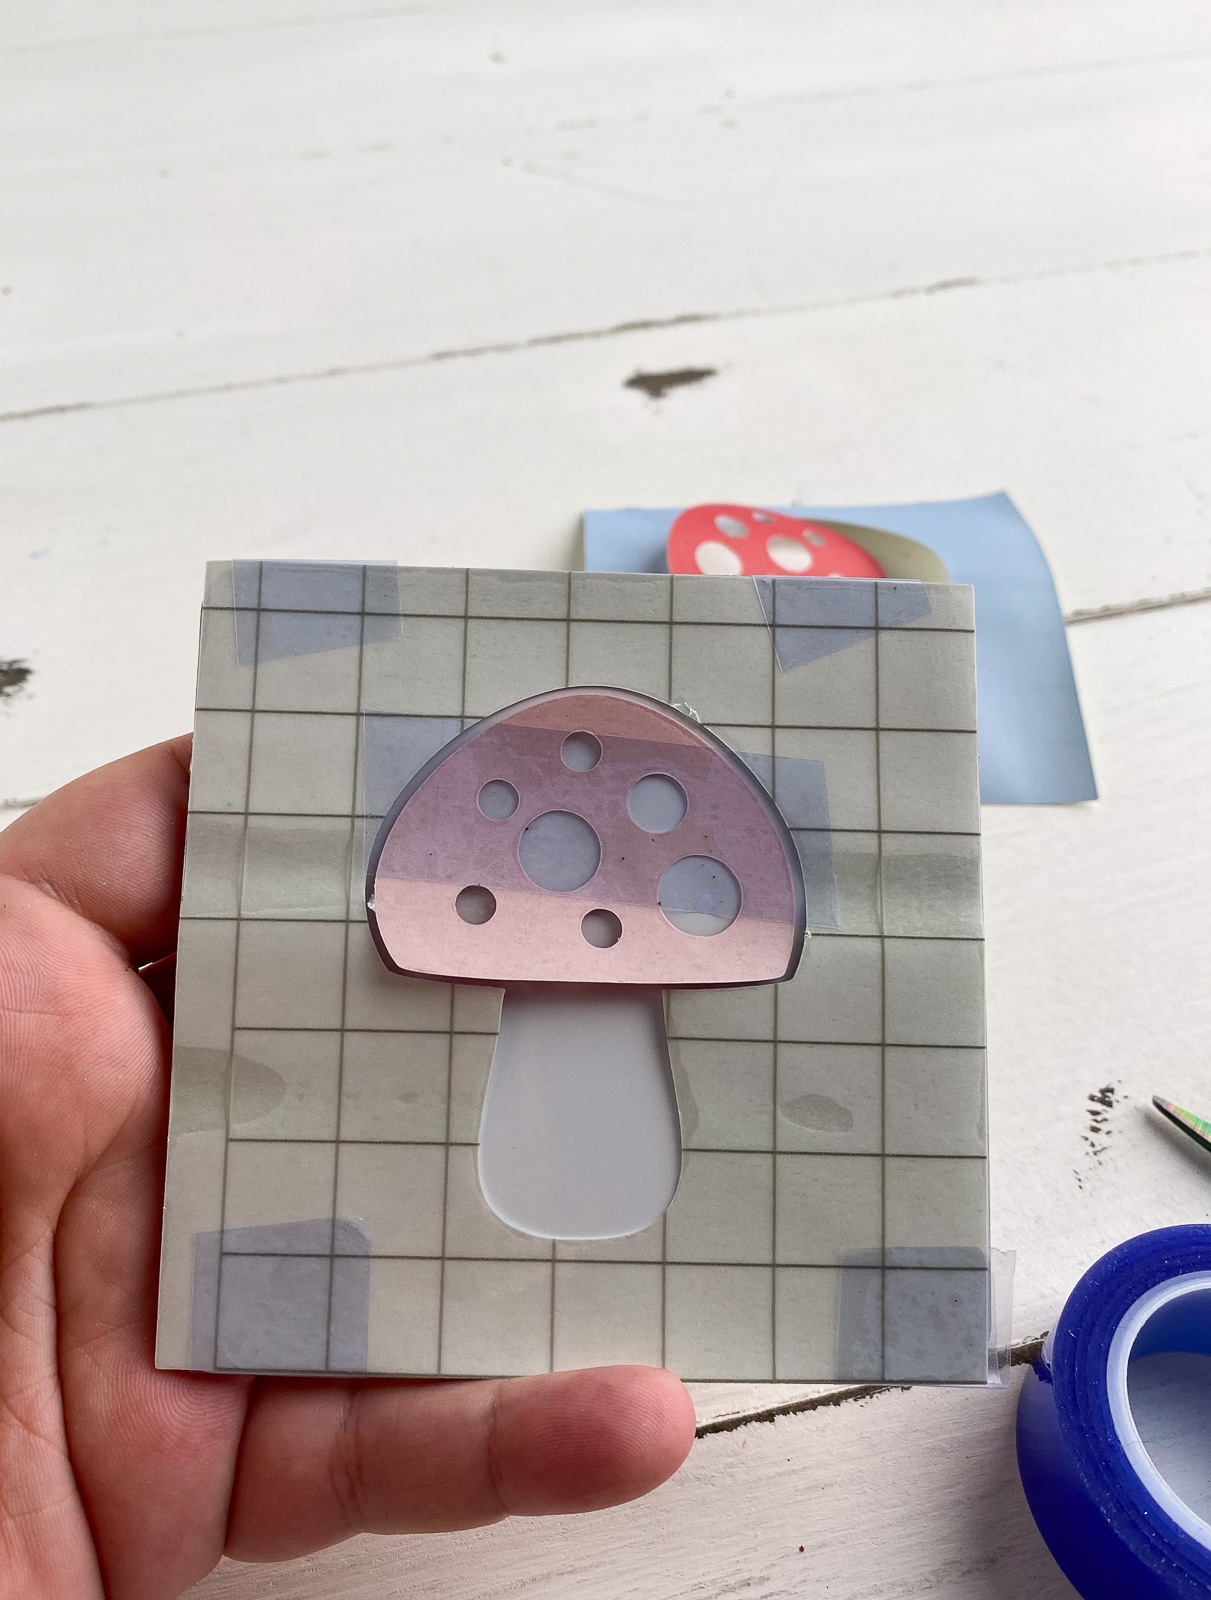
- Place the mushroom cap onto the coaster and tape it in place.
Using the Heat Press on the Coasters
I’ve included the instructions for using an EasyPress 2, the Cricut Coasters, and Cricut infusible ink sheets. If you’re using anything different, be sure to check out the Cricut heat guide to get the correct settings.
- Preheat the EasyPress to 400º.

- Place the coasters onto the mat.
- Cover the coasters with the butcher paper.

- The EasyPress is ready when it beeps and the light turns green.
- Set the timer to 60 seconds.
- Place the EasyPress on the coasters for 60 seconds.

- When it beeps, remove the EasyPress and place it into the cradle.
- Let the coasters cool off for about an hour before removing the infusible ink sheets.


I love how they turned out!

More Infusible Ink Projects
Get the Mushroom Coaster SVG
Free downloads are for personal use only. Please do not redistribute or sell.

Pin for Later!