How to Use Cricut Watercolor Markers
Learn how to use Cricut watercolor markers. These new markers allow you to create watercolor effect cards, even if you’ve never picked up a paintbrush.

This post contains affiliate links. By purchasing an item through an affiliate link, I earn a small commission at no extra cost to you. As an Amazon Associate I earn from qualifying purchases.
As a watercolor artist, I was so excited when I saw that Cricut was selling watercolor cards. It took me a while to realize that they sold watercolor markers to use with them, so naturally I bought those too.
They are really fun to play. The result reminds me of those paint-with-water coloring books from when we were kids.
All About Cricut Watercolor Markers and Cards
The watercolor markers work similarly to any of the other Cricut pens or markers. You choose a design and Cricut draws it for you. Then you add water to create a watercolor effect.
Watercolor Marker Set
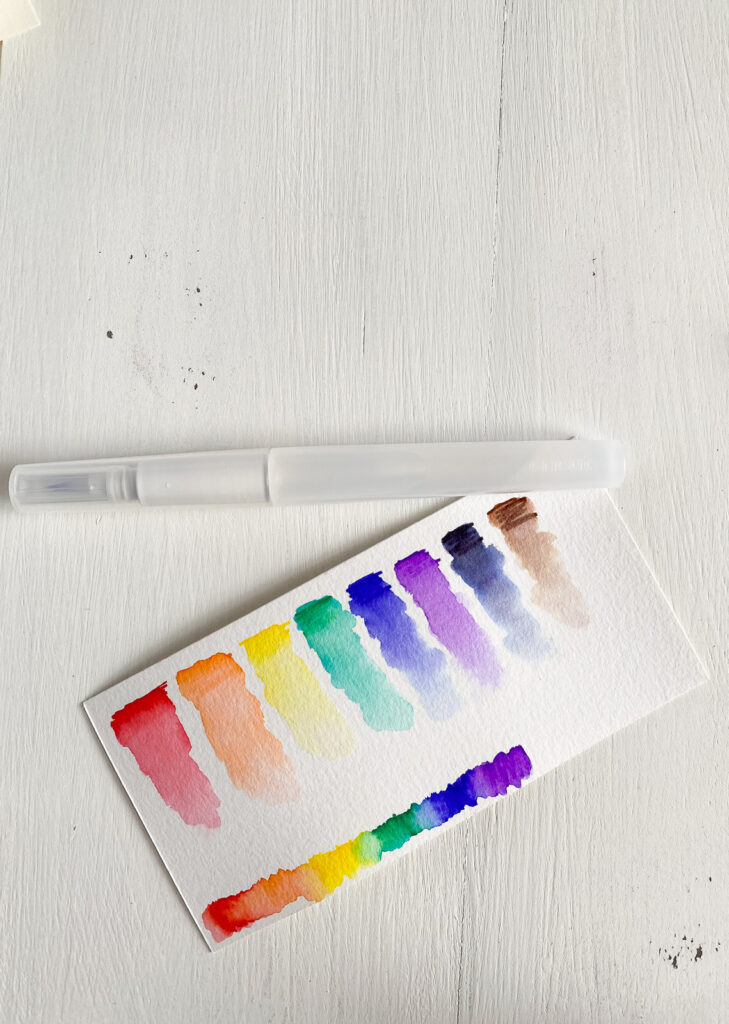
The watercolor marker set includes 8 markers and a waterbrush. It includes the standard red, orange, yellow, green, blue, purple, black, and brown.
At the time of writing, there are no other colors available.
There’s also a set that fits the Cricut Joy. Cricut Joy requires a different size because it’s smaller than a Cricut Maker or Cricut Explore.

If you’ve never used a waterbrush, you fill it with water and then squeeze it out, rather than dipping a brush into a water cup.

They’re usually used as travel brushes, but I can also see kids enjoying them (they’re way less messy!)
Watercolor Cards
The watercolor cards come in a set of 10 or 12 cards (depending on the size) with envelopes. They are cream-colored and slightly textured.
There are currently 3 different sizes available.
The paper is nice and thick. It’s 300 gsm, cold-press cellulose paper. That just means that it’s thick and can hold up to water without warping, it has a slight texture, and it’s made of wood pulp versus cotton.
How to Use Cricut Watercolor Markers
Supplies Needed:
- Watercolor Markers
- Watercolor Cards
- Cricut (I used my Cricut Maker 3)
- Card Mat
- Water
- Paper Towel
- Cricut Access (optional)
Cricut Access is a subscription service that gives you access to tons of designs to use.
It isn’t necessary if you want to create simple designs in Cricut Design Space, but it’s helpful if you don’t want to create your own design.
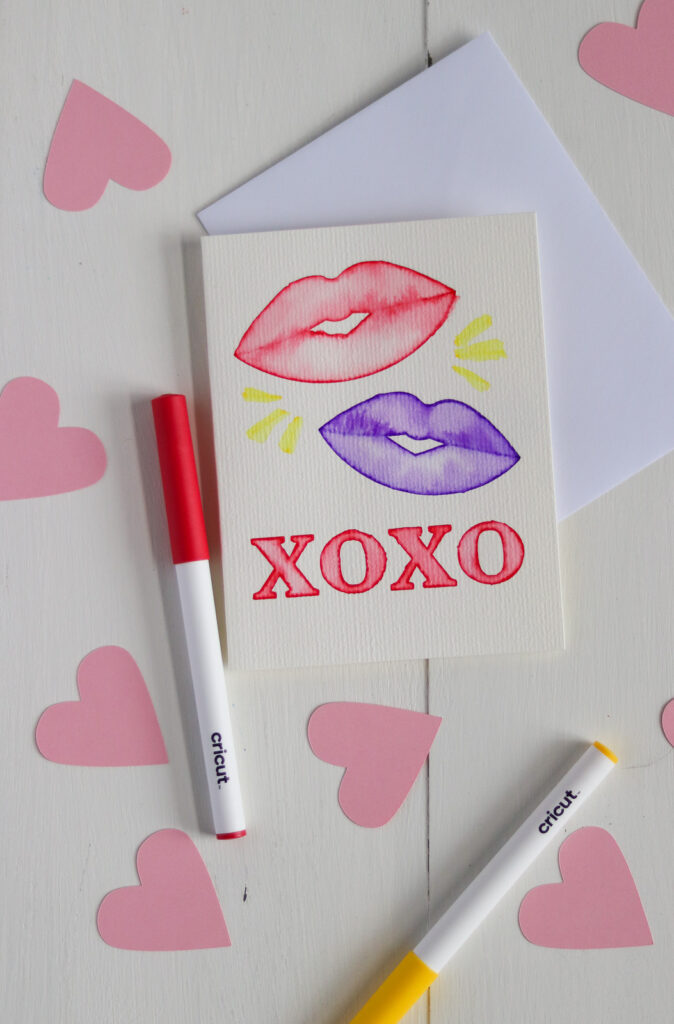
I have a subscription and I ended up using a pre-made design and adding XOXO to the bottom of the card. Search for lips if you want this same design.
Using Watercolor Markers with the Cricut
- Add your design to the canvas. Click the image tab and select “for watercolor markers” under Project type.

- You can change the marker colors in the operations drop-down menu. Make sure that it’s set to Marker and scroll down to find the watercolor marker colors.

- If you don’t want to cut the design out, click the eye next to that layer to hide it.

- When you’re happy with the design, click make it.
- Choose your mat setting. I’m using the card mat.
- Select the right size of card. If your size isn’t showing up, cancel and slightly resize the design. It should show up now.

- You can make more than one if you want. Just change the quantity in the drop-down menu.
- Click continue.
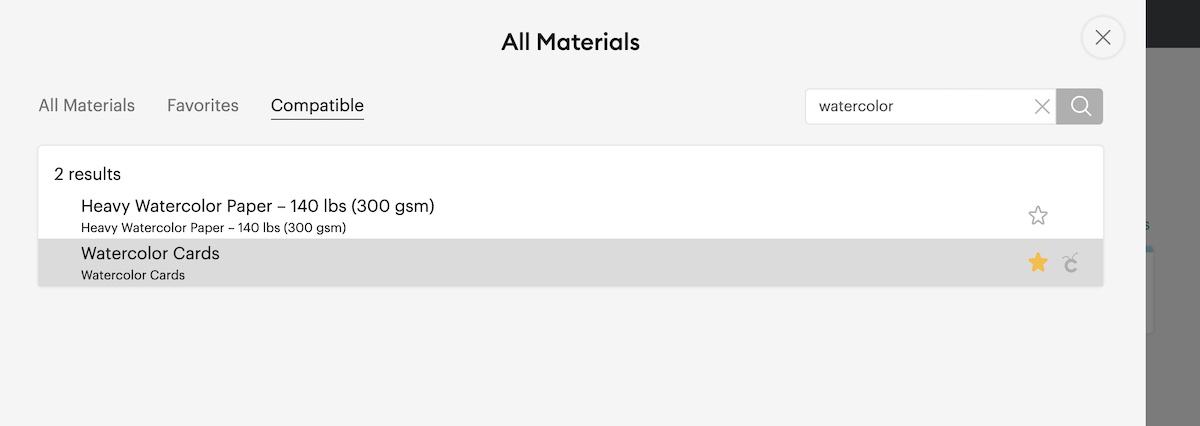
- Select watercolor cards as the material. (It’s located under paper or you can search for it.)
- Insert the card into the first card mat area. Be sure to press the card onto the sticky mat.
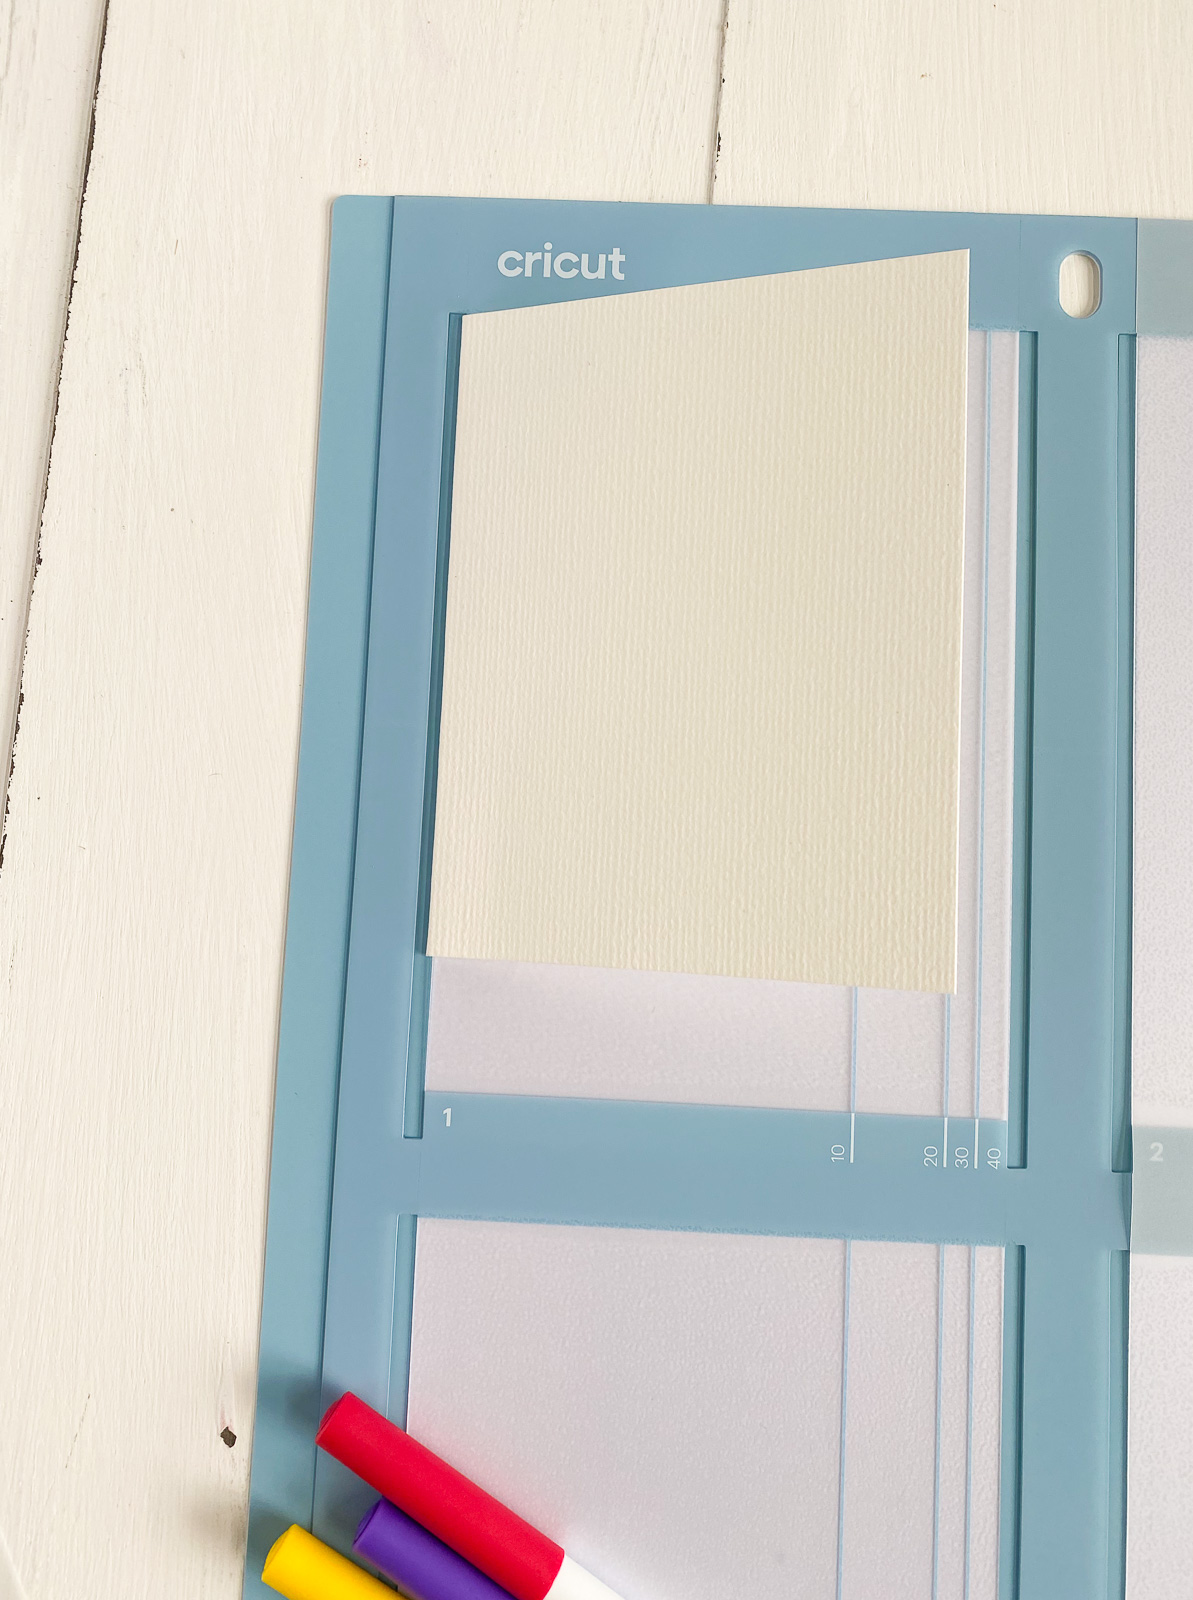
- Move the white star wheels to the side if necessary. (They can create marks on your cards.)
- Insert the marker color as indicated in Cricut design space.
 You shouldn’t be able to see the triangle when it’s properly inserted. Make sure that you click it shut.
- Load the mat and press start.
- Change the marker color when indicated.
- Continue until complete.
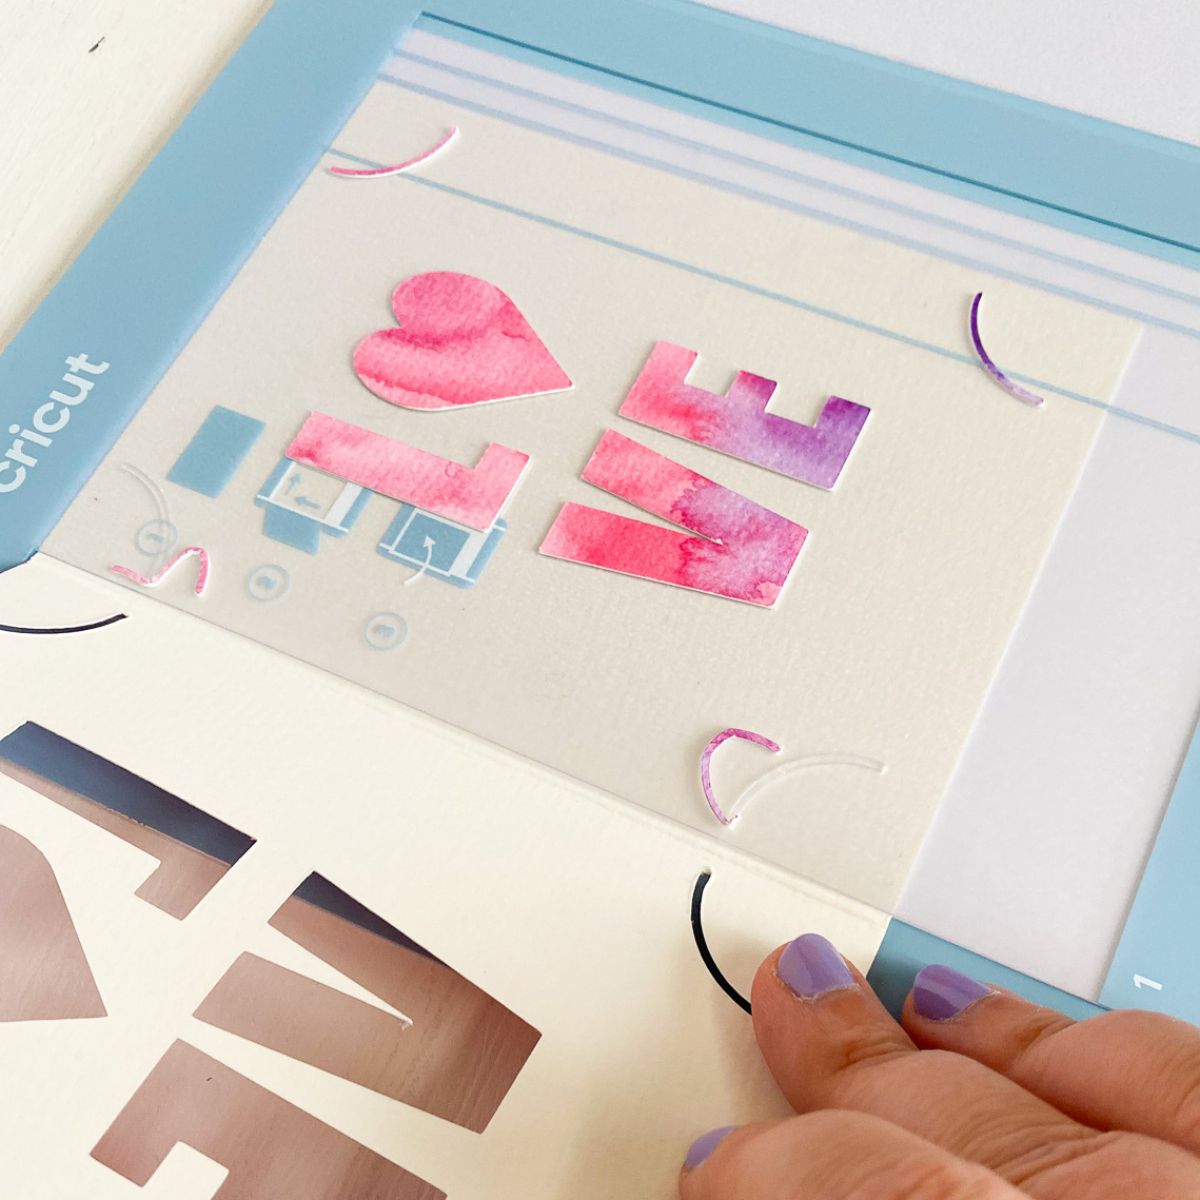
Painting the Watercolor Cards
- When the Cricut is finished with all of the colors, unload the mat.

- Remove the card from the mat.
- Fill the waterbrush with water.
- Make sure that you have a paper towel nearby for blotting.
- Squeeze the clear part of the brush to get the water to come to the bristles. It’s not visible when it’s wet, so touch it to make sure that it’s wet.
- Add water to the center of the design and then move the brush towards the ink.

- Use the brush to move the ink into the center of the design.
- If you make mistakes, embrace them. It adds to the charm.
- Blot your brush in between colors to avoid contaminating the colors.
- If the colors are really close together, let the first one dry completely before starting on the next color. They can blend.
- Let the card dry completely.
- If desired, you can use Cricut pens to add an address to the envelope.
Tips for Painting with a Waterbrush
- Try not to apply too much water. If you add too much water, you can blot it away with a paper towel.
- Go slow for the best results.
- If you have trouble opening the brush, twist it to the top to the right.
- Blot mistakes with a paper towel.
- Mistakes add to the handmade feel of the project.
- Keep color theory in mind if you blend colors. Red and yellow make orange, but red and green make brown.

My Overall Thoughts on the Watercolor Markers
Overall, I thought the watercolor markers were fun to play with. I hope they make more designs to use with them.
The watercolor cards were my favorite part and I can’t wait to share how I used them with my real watercolor paint to create a fun design.

Other Valentine’s Day Posts
- Watercolor Cut Out Card (How to Use a Cricut Card Mat)
- Infusible Ink Marker Mug
- Valentine’s Day Love Letter Garland
Pin for Later!