How to Change from Print and Cut to Cut Only in Cricut Design Space
Learn how to change “print and cut” to “cut” only in Cricut Design Space.
This post contains affiliate links. By purchasing an item through an affiliate link, I earn a small commission at no extra cost to you. As an Amazon Associate I earn from qualifying purchases.
There’s nothing as frustrating as trying to cut your project and having issues with the Cricut Design software.
My first cutting machine was a Silhouette, so the design space often confuses me. Things that just worked in Silhouette need more steps in Cricut.
As I run across issues while working, I’m writing tutorials on how to fix them.
Recently I went to cut some of my designs and ran across this problem. My SVG designs were showing up as “print and cut” when I just wanted to cut them.
Here’s how I fixed this issue.
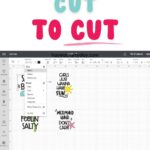
How to Change Print and Cut to Cut Only
Try This First
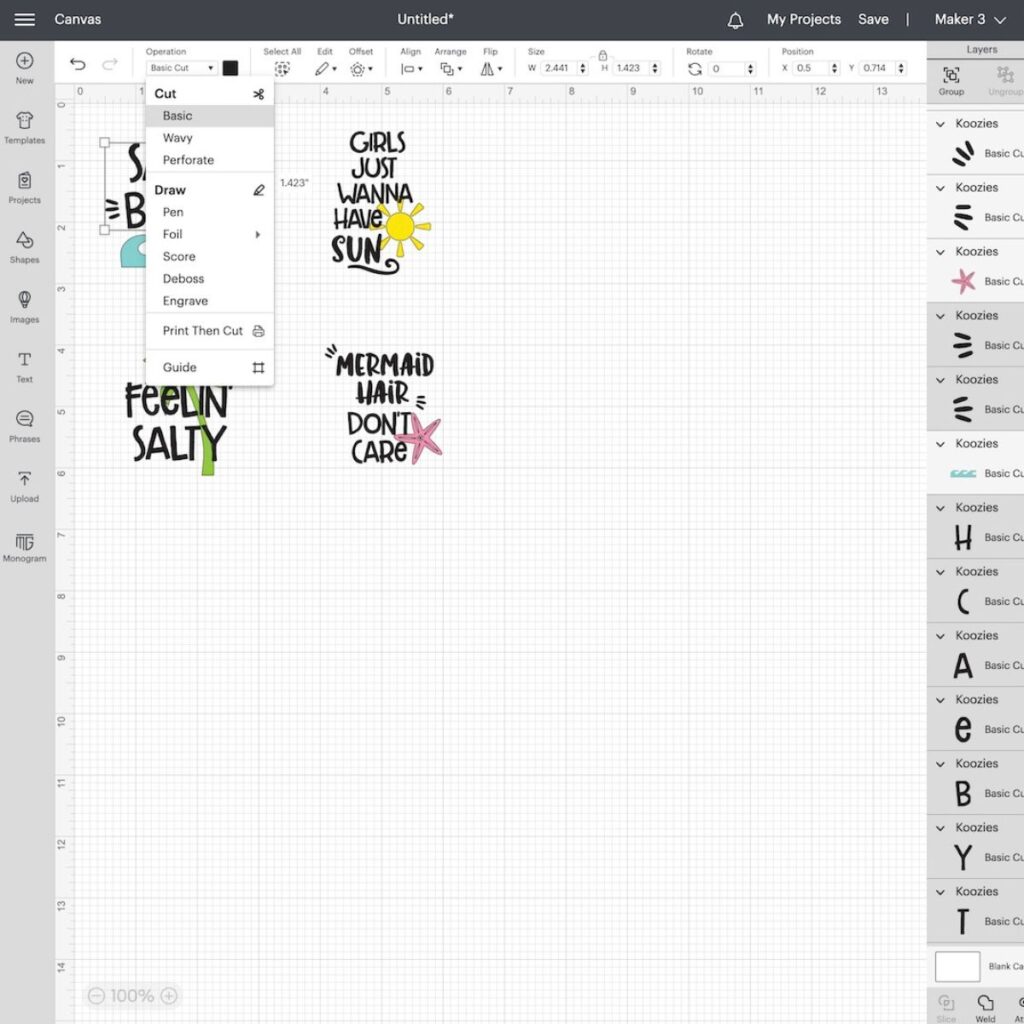
- Select the item (or group of items.)
- Change the setting at the top of the screen from “Print and Cut” to “Cut – Basic.”

If That Still Doesn’t Work
When I was working, the option to change it to a basic cut was greyed out. Here was my mistake.
Did you flatten your layers? If so, select your layers and unflatten the layers.

- Then group the selected items.
- With the group still selected, click attach.

- Then the option to change from “print and cut” to “cut” will work.
(I always get “flatten” and “attach” confused.)
Flatten works for printable designs. It flattens all of the layers into one layer for printing and cutting.
Attach groups all of the items together in the way that you have designed them, but it maintains the layers. So it works great for keeping words in order or even complex designs.
For instance, my sun would have been cut like this:

Which would be a nightmare to place properly and kind of defeats the purpose of this machine.
Attaching fixes this issue and cuts everything in the right order.
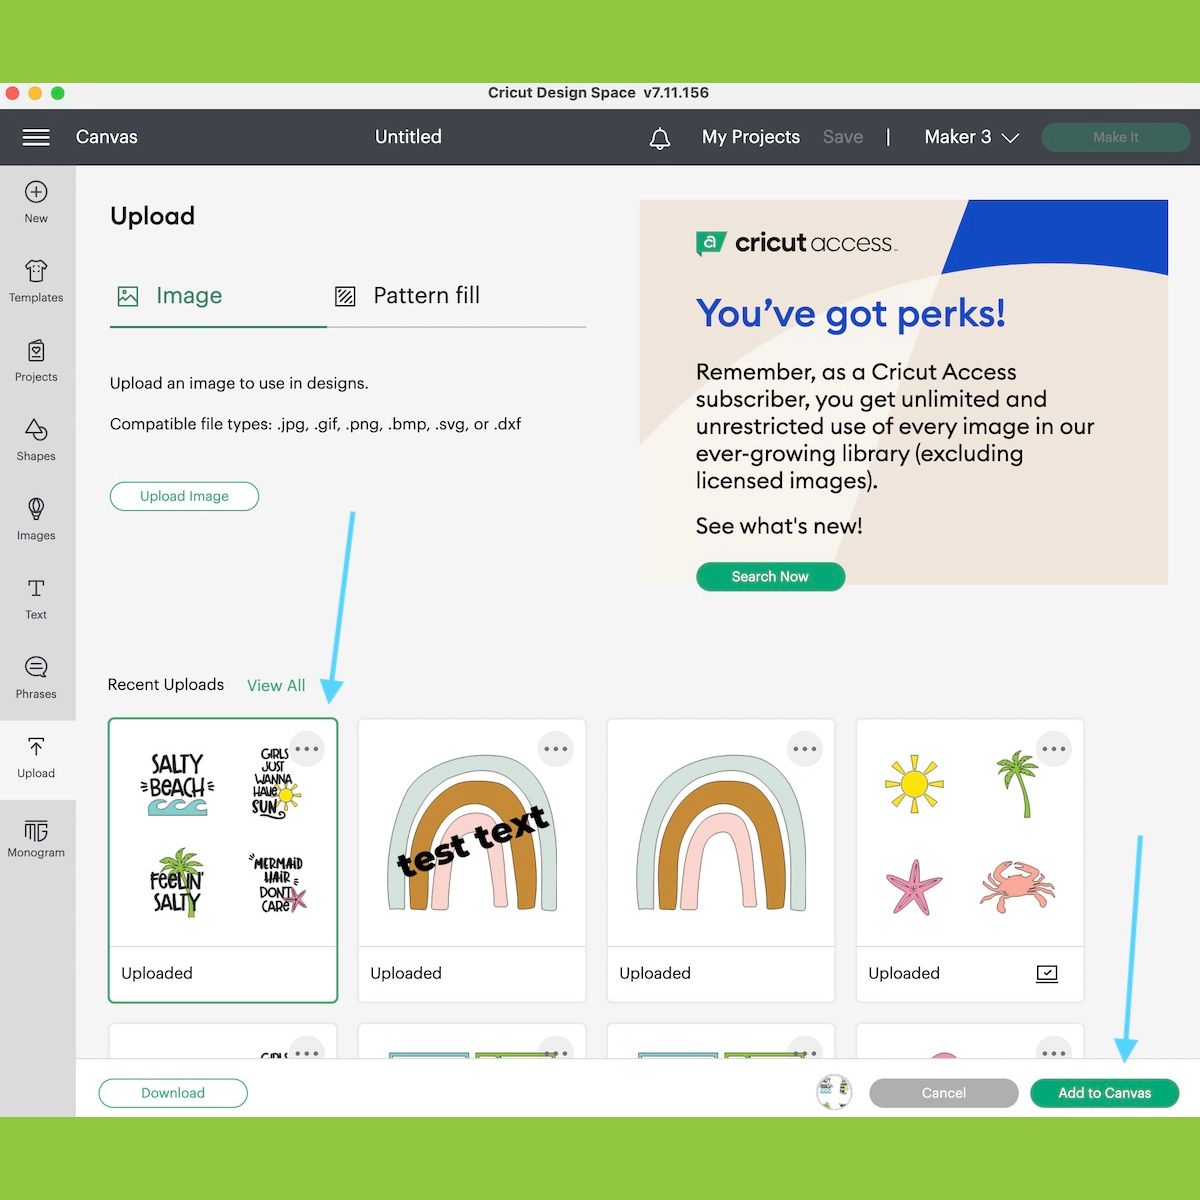
Use the SVG File Instead of a PNG
Another thing to try is to upload the SVG version if you have it. PNG and JPG images are harder to upload to Cricut Design Space, especially if they have multiple colors.
When a design is saved as a PNG or JPG, it’s flattened. Which is fine if the design has one color. But it doesn’t work if there are multiple colors and layers.
Other Cricut Tutorials
Pin for Later!


Hi just found you your site , it was easy to follow but not working .I downloaded a high jumper for a friend , I go up to operation and click basic , that still didn’t work, so I tried the one about flatten and unflatten ,still don’t work. but under layers my slice, combine , attack and flatten etc are not highlighted or gray , so I can’t click on anything down there. Please help !
I don’t have any ideas for how to help besides closing the program out and restarting the design. When you upload it, make sure you’re not choosing print and cut by mistake. (If possible use an SVG file to avoid that.)
THANK YOU THANK YOU THANK YOU. Brand new to this. Machine told me to calibrate and then it wouldn’t cut. Had reset to print and cut. You saved a machine’s life today. 🙂
I’m glad it helped. It’s so frustrating when things don’t work.